

 (Picture:
 In this tutorial I will cover a few strategies to create Django user sign up/registration. Usually I implement it from scratch. You will see it’s very straightforward.
For the examples I will use an empty Django project named mysite. Inside the mysite folder I created an app named core. So every time you see mysite and/or core, change to the suitable project name and app name.
A brief summary of what you are going to find here:
Basic Sign Up
The most simple way to implement a user sign up is by using the UserCreationForm as it is. This strategy is suitable
in case you are using the default Django user, using username to authenticate and is interested only in setting the
username and password upon sign up.
urls.py
from django.conf.urls import url
from mysite.core import views as core_views

urlpatterns = [
    ...
    url(r'^signup/$', core_views.signup, name='signup'),
]
views.py
from django.contrib.auth import login, authenticate
from django.contrib.auth.forms import UserCreationForm
from django.shortcuts import render, redirect

def signup(request):
    if request.method == 'POST':
        form = UserCreationForm(request.POST)
        if form.is_valid():
            form.save()
            username = form.cleaned_data.get('username')
            raw_password = form.cleaned_data.get('password1')
            user = authenticate(username=username, password=raw_password)
            login(request, user)
            return redirect('home')
    else:
        form = UserCreationForm()
    return render(request, 'signup.html', {'form': form})
signup.html
{% extends 'base.html' %}

{% block content %}
  <h2>Sign up</h2>
  <form method="post">
    {% csrf_token %}
    {{ form.as_p }}
    <button type="submit">Sign up</button>
  </form>
{% endblock %}
Basically what we are doing here is handling the UserCreationForm processing. Business as usual. After the code reach
form.save(), the user is created. But here we need to take a step further: manually authenticate the user. You could
redirect the user to the login page, but performing the authentication is good for the user experience.
In order to perform the authentication, we need to grab the raw password from the input that came from POST. The
user.password stores the hash, and we can’t use it directly to authenticate.
If the authenticate() function is executed successfully (in this case it will always return a success), it will
a user instance (meaning the username and password matches), we can now securely log the user in. It’s done by
calling the login() function, passing the request and the user instance as parameter. After that, simply
redirect the user to wherever you want.
If you want more control over the signup.html form, you can extract the fields in a for loop:
signup.html
{% extends 'base.html' %}

{% block content %}
  <h2>Sign up</h2>
  <form method="post">
    {% csrf_token %}
    {% for field in form %}
      <p>
        {{ field.label_tag }}<br>
        {{ field }}
        {% if field.help_text %}
          <small style="color: grey">{{ field.help_text }}</small>
        {% endif %}
        {% for error in field.errors %}
          <p style="color: red">{{ error }}</p>
        {% endfor %}
      </p>
    {% endfor %}
    <button type="submit">Sign up</button>
  </form>
{% endblock %}
It will look like this:
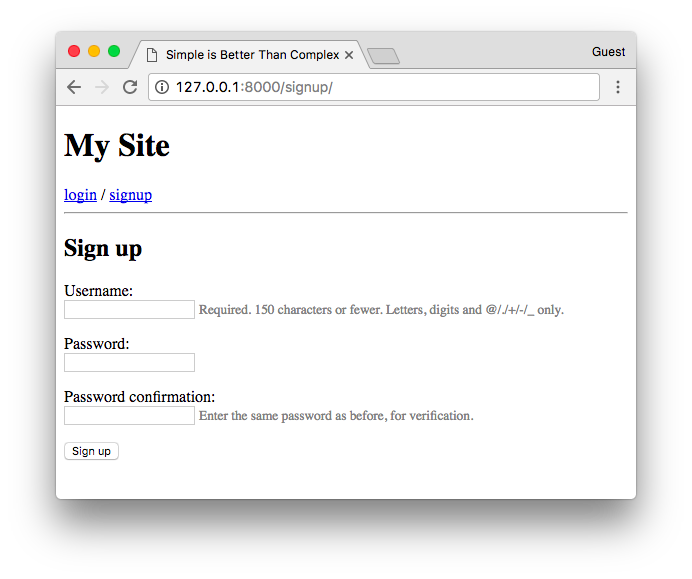
The code is available on GitHub: github.com/sibtc/simple-signup/tree/master/basic-example.
Sign Up With Extra Fields
So, what if I wanted to also get the user’s email address and full name upon sign up?
This strategy will work if you are using the Django user as it is, or if you have extended it using the AbstractUser or AbstractBaseUser. If you extended the Django user using a Profile model, hold tight, we will get there too.
Now we need a step further, we have to extend the UserCreationForm.
forms.py
from django import forms
from django.contrib.auth.forms import UserCreationForm
from django.contrib.auth.models import User


class SignUpForm(UserCreationForm):
    first_name = forms.CharField(max_length=30, required=False, help_text='Optional.')
    last_name = forms.CharField(max_length=30, required=False, help_text='Optional.')
    email = forms.EmailField(max_length=254, help_text='Required. Inform a valid email address.')

    class Meta:
        model = User
        fields = ('username', 'first_name', 'last_name', 'email', 'password1', 'password2', )
Now in the view, just change the form class to use our new SignUpForm.
views.py
from django.contrib.auth import login, authenticate
from django.shortcuts import render, redirect

from mysite.core.forms import SignUpForm

def signup(request):
    if request.method == 'POST':
        form = SignUpForm(request.POST)
        if form.is_valid():
            form.save()
            username = form.cleaned_data.get('username')
            raw_password = form.cleaned_data.get('password1')
            user = authenticate(username=username, password=raw_password)
            login(request, user)
            return redirect('home')
    else:
        form = SignUpForm()
    return render(request, 'signup.html', {'form': form})
It will look like this:
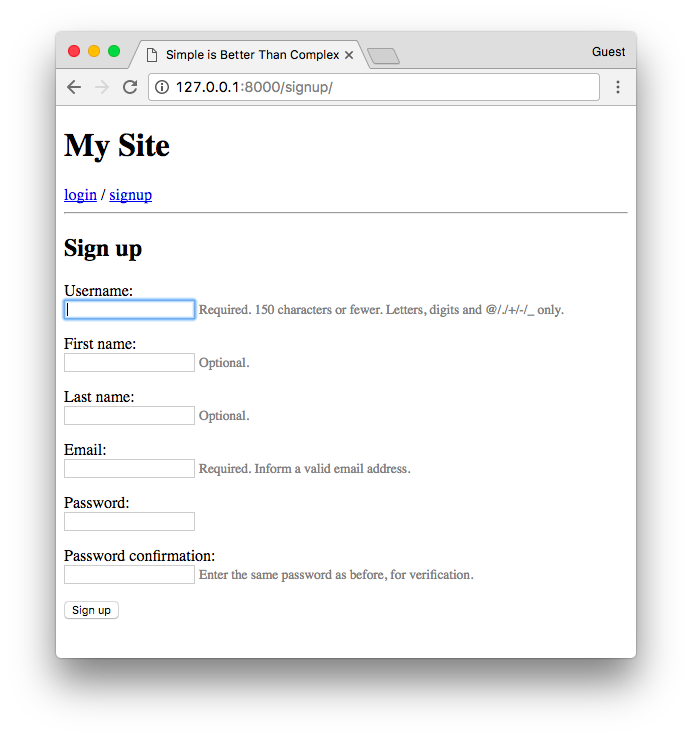
By the way, if you are wondering about the template, I’m using the same signup.html template from the previous example.
The code is available on GitHub: github.com/sibtc/simple-signup/tree/master/extra-fields.
Sign Up With Profile Model
With some tweaks we can also make it work using a profile model. Consider the model definition:
models.py
from django.db import models
from django.contrib.auth.models import User
from django.db.models.signals import post_save
from django.dispatch import receiver

class Profile(models.Model):
    user = models.OneToOneField(User, on_delete=models.CASCADE)
    bio = models.TextField(max_length=500, blank=True)
    location = models.CharField(max_length=30, blank=True)
    birth_date = models.DateField(null=True, blank=True)

@receiver(post_save, sender=User)
def update_user_profile(sender, instance, created, **kwargs):
    if created:
        Profile.objects.create(user=instance)
    instance.profile.save()
In this particular case, the profile is created using a Signal. It’s not mandatory, but usually it is a good way to implement it. You can learn more about extending the user model in this post.
Let’s say we want to also get the birth_date of the user upon sign up. First, let’s update the model form:
forms.py
from django import forms
from django.contrib.auth.forms import UserCreationForm
from django.contrib.auth.models import User

class SignUpForm(UserCreationForm):
    birth_date = forms.DateField(help_text='Required. Format: YYYY-MM-DD')

    class Meta:
        model = User
        fields = ('username', 'birth_date', 'password1', 'password2', )
This form won’t save automatically the birth_date on form.save(). Instead, we have to handle it manually:
views.py
from django.contrib.auth import login, authenticate
from django.shortcuts import render, redirect
from mysite.core.forms import SignUpForm

def signup(request):
    if request.method == 'POST':
        form = SignUpForm(request.POST)
        if form.is_valid():
            user = form.save()
            user.refresh_from_db()  # load the profile instance created by the signal
            user.profile.birth_date = form.cleaned_data.get('birth_date')
            user.save()
            raw_password = form.cleaned_data.get('password1')
            user = authenticate(username=user.username, password=raw_password)
            login(request, user)
            return redirect('home')
    else:
        form = SignUpForm()
    return render(request, 'signup.html', {'form': form})
Because of the Signal handling the Profile creation, we have a synchronism issue here. It is easily solved by calling
the user.refresh_from_db() method. This will cause a hard refresh from the database, which will retrieve the profile
instance.
If you don’t call user.refresh_from_db(), when you try to access the user.profile, it will return None.
After refreshing it user model, set the cleaned data to the fields that matter, and save the user model. The user save
will trigger the profile save as well, that’s why you don’t need to call user.profile.save(), instead you call just
user.save().
I updated the birth_date directly in the view, but in case you are dealing with a bigger amount of fields in the profile model, I would suggest creating two forms (say, UserForm and ProfileForm), and process both at once. Check this gist for an example.
The code is available on GitHub: github.com/sibtc/simple-signup/tree/master/profile-model.
Sign Up With Confirmation Mail
This one requires a more complicated setup. Because you know, you need to configure email, need some extra fields, unique links with expiration date, and stuff like that.
I have already published in great detail each one of those parts, so in this post I will just put the pieces together.
For testing purpose, I will be using the console email backend, to debug the code:
settings.py
EMAIL_BACKEND = 'django.core.mail.backends.console.EmailBackend'If you want to configure a production quality email service, read more in this post: How to Send Email in a Django App.
Create a field to determine if the email is confirmed or not:
models.py
from django.db import models
from django.contrib.auth.models import User
from django.db.models.signals import post_save
from django.dispatch import receiver

class Profile(models.Model):
    user = models.OneToOneField(User, on_delete=models.CASCADE)
    email_confirmed = models.BooleanField(default=False)
    # other fields...

@receiver(post_save, sender=User)
def update_user_profile(sender, instance, created, **kwargs):
    if created:
        Profile.objects.create(user=instance)
    instance.profile.save()
In an previous article I explained how to make use of some Django internal apis to create one time link. You can read more about it here: How to Create a One Time Link (in case you want to learn more how it works).
For our use case, create a new module named tokens.py.
tokens.py
from django.contrib.auth.tokens import PasswordResetTokenGenerator
from django.utils import six

class AccountActivationTokenGenerator(PasswordResetTokenGenerator):
    def _make_hash_value(self, user, timestamp):
        return (
            six.text_type(user.pk) + six.text_type(timestamp) +
            six.text_type(user.profile.email_confirmed)
        )

account_activation_token = AccountActivationTokenGenerator()
We basically extended the PasswordResetTokenGenerator to create a unique token generator to confirm email addresses.
This make use of your project’s SECRET_KEY, so it is a pretty safe and reliable method.
Now we need to enforce the email registration on sign up.
forms.py
from django import forms
from django.contrib.auth.forms import UserCreationForm
from django.contrib.auth.models import User


class SignUpForm(UserCreationForm):
    email = forms.EmailField(max_length=254, help_text='Required. Inform a valid email address.')

    class Meta:
        model = User
        fields = ('username', 'email', 'password1', 'password2', )
In the view processing we will no longer authenticate the user, instead we will email him/her the account activation email:
views.py
from django.contrib.sites.shortcuts import get_current_site
from django.shortcuts import render, redirect
from django.utils.encoding import force_bytes
from django.utils.http import urlsafe_base64_encode
from django.template.loader import render_to_string
from mysite.core.forms import SignUpForm
from mysite.core.tokens import account_activation_token

def signup(request):
    if request.method == 'POST':
        form = SignUpForm(request.POST)
        if form.is_valid():
            user = form.save(commit=False)
            user.is_active = False
            user.save()
            current_site = get_current_site(request)
            subject = 'Activate Your MySite Account'
            message = render_to_string('account_activation_email.html', {
                'user': user,
                'domain': current_site.domain,
                'uid': urlsafe_base64_encode(force_bytes(user.pk)),
                'token': account_activation_token.make_token(user),
            })
            user.email_user(subject, message)
            return redirect('account_activation_sent')
    else:
        form = SignUpForm()
    return render(request, 'signup.html', {'form': form})
Basically this is the same strategy for password reset. Notice that I’m changing the user.is_active to False, so
the user can’t log in before confirming the email address. After that, we send the email for the user. See below
the contents of the email template.
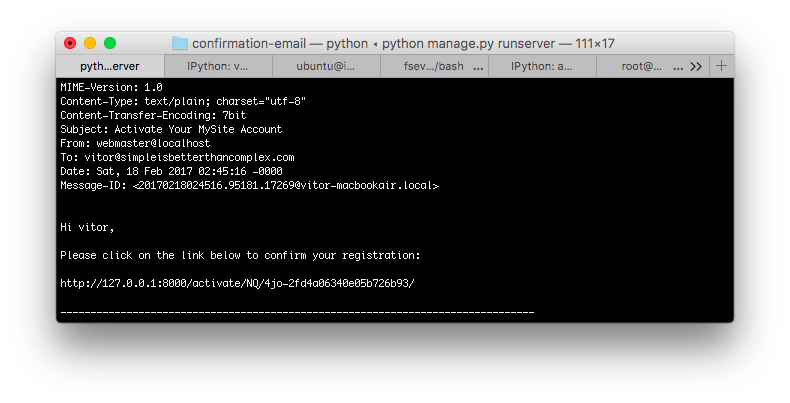
account_activation_email.html
{% autoescape off %}
Hi {{ user.username }},

Please click on the link below to confirm your registration:

http://{{ domain }}{% url 'activate' uidb64=uid token=token %}
{% endautoescape %}
And here is the routes you will need:
urls.py
from django.conf.urls import url
from mysite.core import views as core_views

urlpatterns = [
    url(r'^account_activation_sent/$', core_views.account_activation_sent, name='account_activation_sent'),
    url(r'^activate/(?P<uidb64>[0-9A-Za-z_\-]+)/(?P<token>[0-9A-Za-z]{1,13}-[0-9A-Za-z]{1,20})/$',
        core_views.activate, name='activate'),
]
The account_activation_sent view is a simple HTML template:
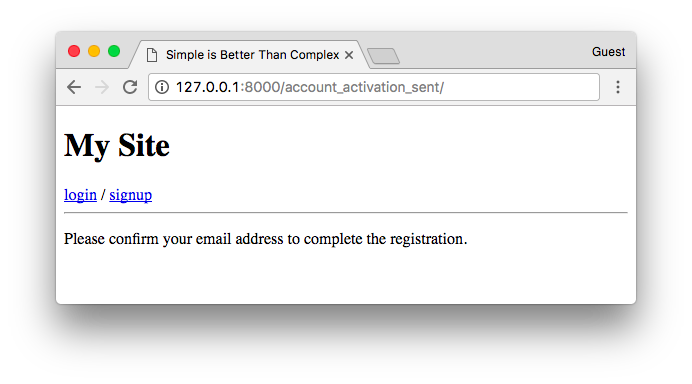
This page is showed right after the user submit the sign up form. Then, at the same time, the user will receive an email with the link:
By clicking in the link, the user is sent to the activate view:
views.py
from django.contrib.auth import login
from django.contrib.auth.models import User
from django.shortcuts import render, redirect
from django.utils.encoding import force_text
from django.utils.http import urlsafe_base64_decode
from mysite.core.tokens import account_activation_token

def activate(request, uidb64, token):
    try:
        uid = force_text(urlsafe_base64_decode(uidb64))
        user = User.objects.get(pk=uid)
    except (TypeError, ValueError, OverflowError, User.DoesNotExist):
        user = None

    if user is not None and account_activation_token.check_token(user, token):
        user.is_active = True
        user.profile.email_confirmed = True
        user.save()
        login(request, user)
        return redirect('home')
    else:
        return render(request, 'account_activation_invalid.html')
Here we do all the magic, checking if the user exists, if the token is valid. If everything checks, we switch the flags
is_active and email_confirmed to True and log the user in.
By changing the value of the email_confirmed field, it will cause the link to be invalidated.
The code is available on GitHub: github.com/sibtc/simple-signup/tree/master/confirmation-email.
That’s it! I hope you enjoyed this post. In a future post I can explore the third party libraries that help the registration process. But usually I prefer to implement it by myself, and avoid an extra dependency.
All the four examples are available on GitHub in the same repository:
 What You Should Know About The Django User Model
 How to Implement Multiple User Types with Django
 How to Implement Case-Insensitive Username
 How to Extend Django User Model
 How to Setup a SSL Certificate on Nginx for a Django Application
 How to Deploy a Django Application to Digital Ocean