Sending emails with Django is a really easy task. In this short tutorial I will guide you through the necessary steps to set up your Django Application to start sending emails right away.
The most common use case for sending emails in a Django Application are for password reset, account activation and sending general notifications related to your app.
Django also provides mechanisms to send error reports via email. In the beginning it is great. But after a while you will realize that it can get pretty spammy. Specially if your application has a high traffic.
Requirements
To start sending transactional emails you will need:
- A registered domain
- An email service
You can pretty much use any email service using SMTP, even a Gmail account. Usually it is not a good idea, because the Gmail service was designed to be used as a personal email account, so it does not expect you to send many emails in a short period of time. But just for testing it is absolutely fine. Even though there is better options to test the emails your application sends in the development environment.
So, for this tutorial we will be using the free SendGrid plan, which gives you 12.000 free emails per month. It should be enough for you to get started.
Get a SendGrid account
Go ahead and create a free SendGrid account. In the homepage should have a Try Free button:
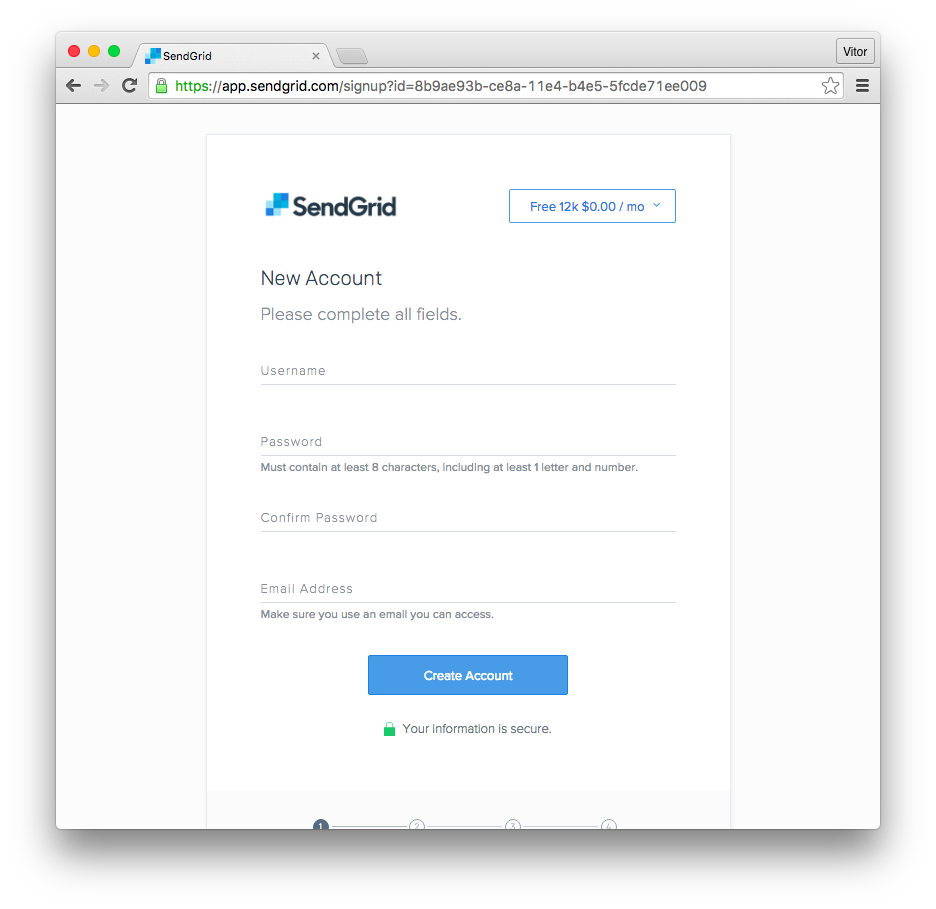
After creating your account, you should activate it clicking on the link they send via email to confirm your email address. New accounts usually starts in provisioning mode. It should not take so long for them to release your account.
Set up a domain on SendGrid
Logged in your SendGrid account, go to the Dashboard and find the menu:
Settings > Whitelabels > Domains
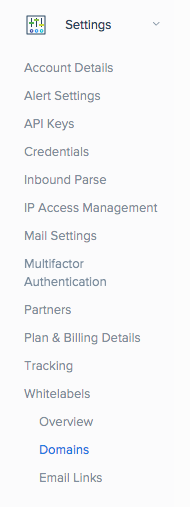
Click on Add Whitelabel:

Click on + Use New Domain:

Add a subdomain and the domain you want to use to send emails and hit the Save button:
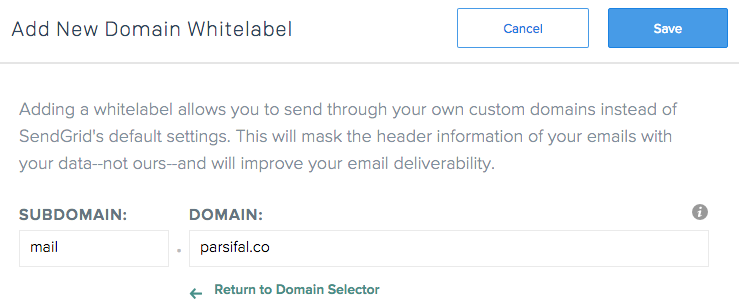
After saving the new register, you should see something like the picture below:
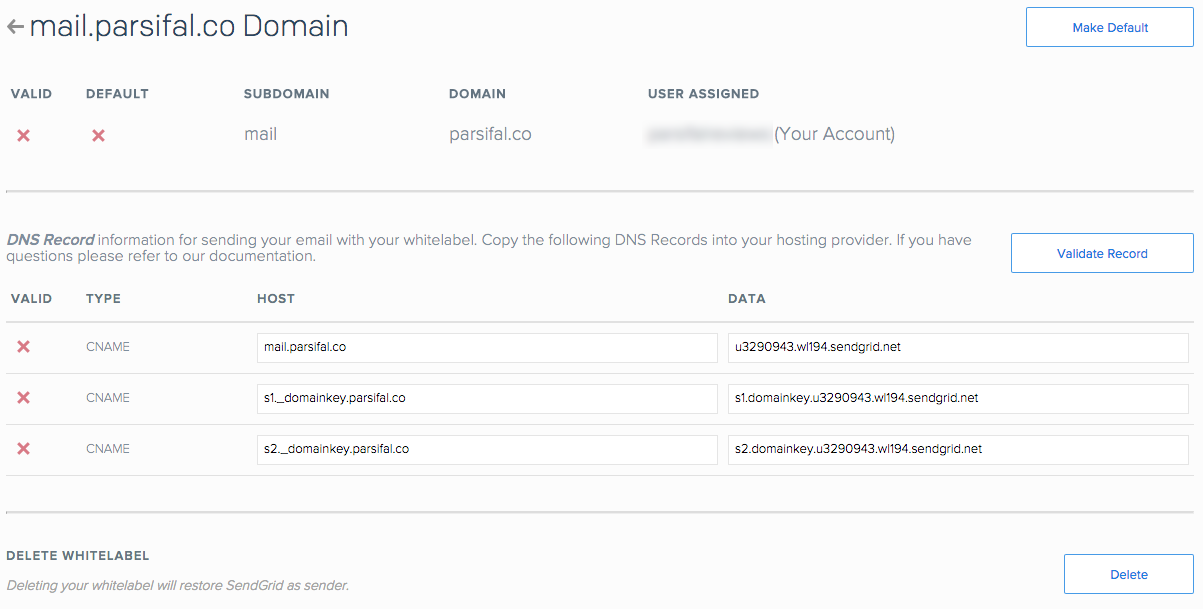
The following steps depends on where you have registered your domain. In my case, I have used the iwantmyname service.
Basically you will need to create three CNAME records in the DNS management of your domain, using the provided
values:
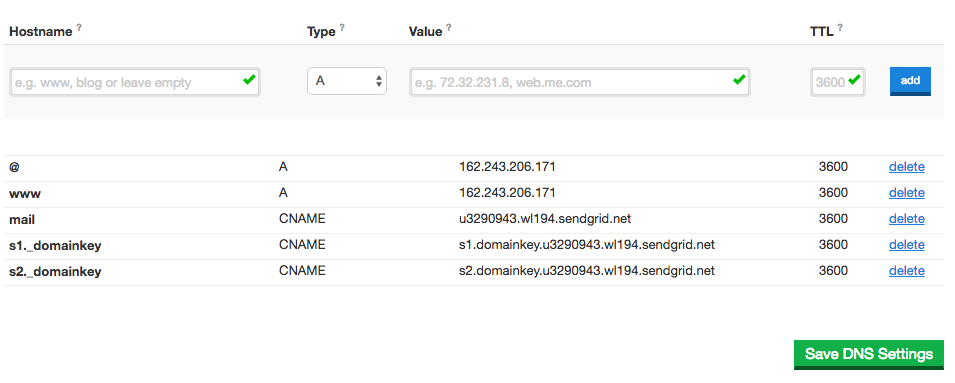
Note that the DNS management will already append the parsifal.co part of the value. So instead of putting
s1._domainkey.parsifal.co in the host, use just s1._domainkey, like in the example above.
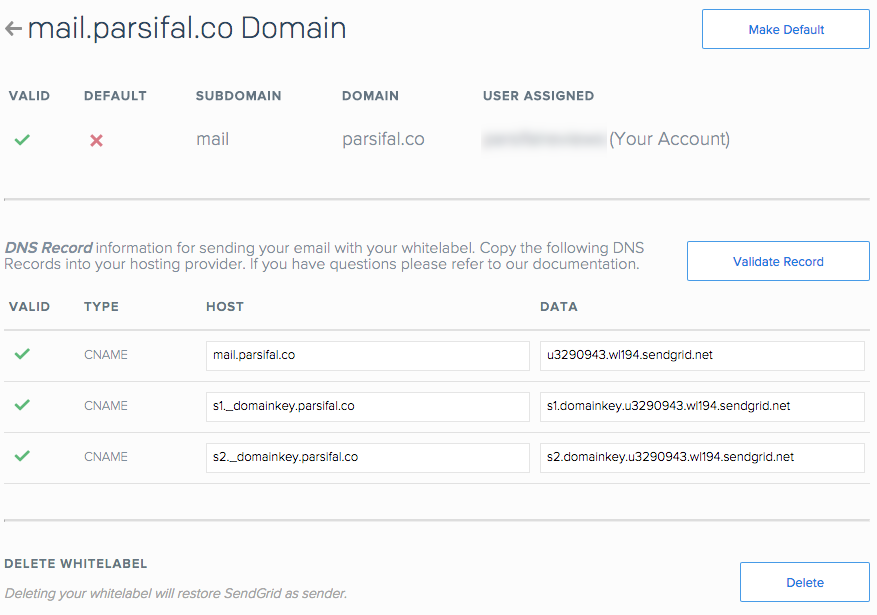
Now after creating the three CNAME records, click on the Validate Record button on SendGrid:

If you did everything correctly, you should now see some green ticks:
Create a new credential on SendGrid
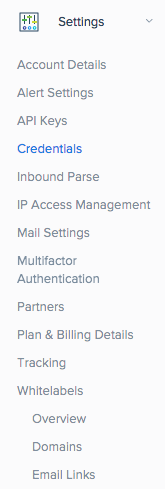
Go to the Dashboard and find the menu:
Settings > Credentials:
Click on the Add New Credential button:
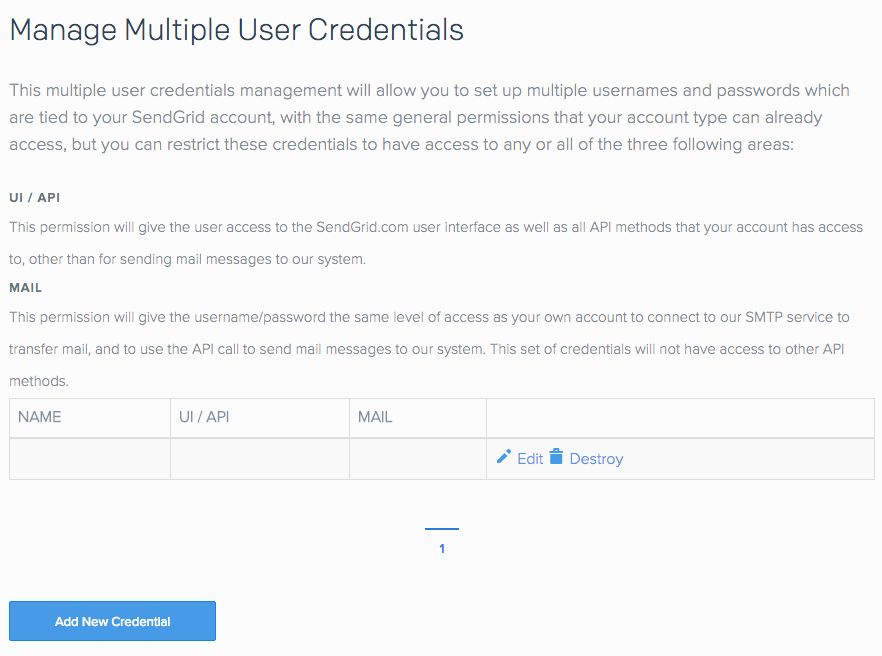
Create an username and password and click on the mail option and click on the Create Credential button:
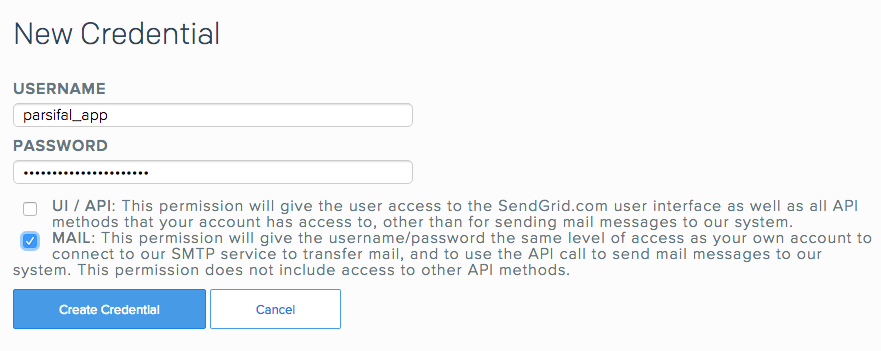
We are now all set up to start sending emails:

Configuring Django to send emails
To configure you Django App, add the following parameters to your settings.py:
EMAIL_HOST = 'smtp.sendgrid.net'
EMAIL_PORT = 587
EMAIL_HOST_USER = 'parsifal_app'
EMAIL_HOST_PASSWORD = 'mys3cr3tp4ssw0rd'
EMAIL_USE_TLS = True
Note that we have some sensitive informations here, such as the EMAIL_HOST_PASSWORD. You should not put it directly
to your settings.py file or commit it to a public repository. Instead use environment variables or use the Python
library Python Decouple. I have also written a
tutorial on how to use Python Decouple.
Sending emails in your Django Application
Here is a very simple snippet to send an email:
from django.core.mail import send_mail

send_mail('subject', 'body of the message', 'sender@example.com', ['receiver1@example.com', 'receiver2@example.com'])
Where sender@example.com is the address from where you are sending the email, and
['receiver1@example.com', 'receiver2@example.com'] is the list of recipients, i.e., the to field. To send
and email for a single person, you pass a list with only one email:
from django.core.mail import send_mail

send_mail('subject', 'body of the message', 'sender@example.com', ['receiver1@example.com',])
And here is how the email will look like, displaying properly your domain:

Basic Django Email Functions
Django implements a module on top of Python’s smtplib, offering some very convenient functions, detailed below.
The module is available at django.core.mail.
send_mail()
This is the simpliest way to send emails. It uses the following parameters:
- subject: A string;
- message: A string;
- from_email: A string;
- recipient_list: A list of strings;
- fail_silently: A boolean;
- auth_user: The optional username to use to authenticate to the SMTP server;
- auth_password: The optional password to use to authenticate to the SMTP server;
- connection: The optional email backend to use to send the mail;
- html_message: An optional string containg the messsage in HTML format.
The return value will be the number of successfully delivered messages (which can be 0 or 1 since it can only send one message).
send_mass_mail()
A function to handle mass emailing. It uses the following parameters:
- datatuple: is a tuple in which each element is in this format:
(subject, message, from_email, recipient_list)
- fail_silently: A boolean;
- auth_user: The optional username to use to authenticate to the SMTP server;
- auth_password: The optional password to use to authenticate to the SMTP server;
- connection: The optional email backend to use to send the mail.
Example:
message1 = ('Subject here', 'Here is the message', 'from@example.com', ['first@example.com', 'other@example.com'])
message2 = ('Another Subject', 'Here is another message', 'from@example.com', ['second@test.com'])
send_mass_mail((message1, message2), fail_silently=False)
The return value will be the number of successfully delivered messages.
In this tutorial we went through the most important steps into configuring a email service in a Django Application. There is many other configuration options and built-in functions. If you want to learn more, have a look on the official Django Documentation about Sending Email.
If you have any questions, leave a comment here and I will be glad to answer!


 (Picture:
  Ask Vitor #3: Mocking Emails
 How to Configure Mailgun To Send Emails in a Django Project
 How to Extend Django User Model
 How to Setup a SSL Certificate on Nginx for a Django Application
 How to Deploy a Django Application to Digital Ocean