

 (Picture:
 In this tutorial you will learn how to setup a Django project to send emails using the Mailgun service.
Previously I’ve published in the blog a post about how to configure SendGrid to send emails. It’s a great service, but they don’t offer free plans anymore, nowadays it’s just a 30 days free trail. So, I thought about sharing the whole email setup with a better option to get started.
Mailgun is great and super easy to setup. The first 10,000 emails you send are always free. The only downside is that if you don’t provide a payment information (even though you are only going to use the first 10,000 free emails), there will be some limitations, such as requiring to configure “Authorized Recipients” for custom domains, which pretty much makes it useless, unless you know beforehand the email addresses you will be sending emails.
Anyway, let’s get started.
Initial Setup
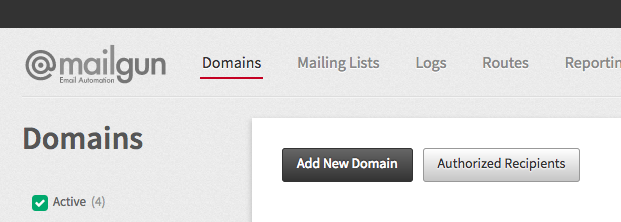
Go to www.mailgun.com and create a free account. Sign in with your Mailgun account, click on Domains and then Add New Domain.
I will setup the Mailgun service for a domain I own, “www.bottlenose.co”. For the setup, it’s advised to use the “mg” subdomain, so you will need to provide the Domain Name like this:
mg.bottlenose.coFrom now on, always change bottlenose.co with your domain name.
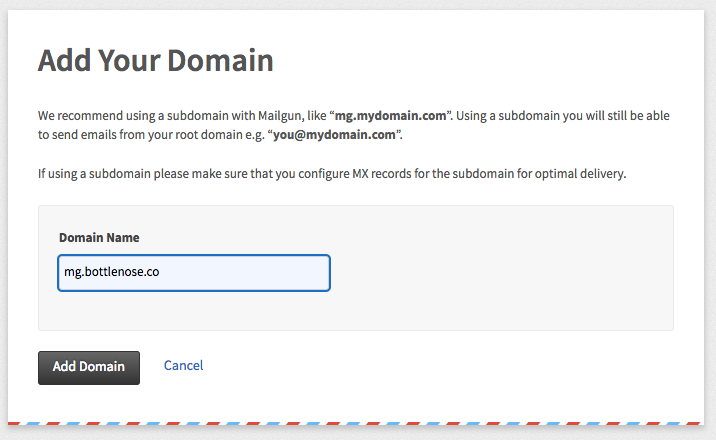
Click on Add Domain.
Domain Verification & DNS
To perform the next steps, you will need to access the DNS provider of your domain. Normally it’s managed by the service/website you registered your domain name. In my name, I registered the “www.bottlenose.co” domain using Namecheap.
The next steps should be more or less the name. Try to find something that says “manage”, “DNS records”, “Advanced DNS” or something similar.
DNS Records For Sending
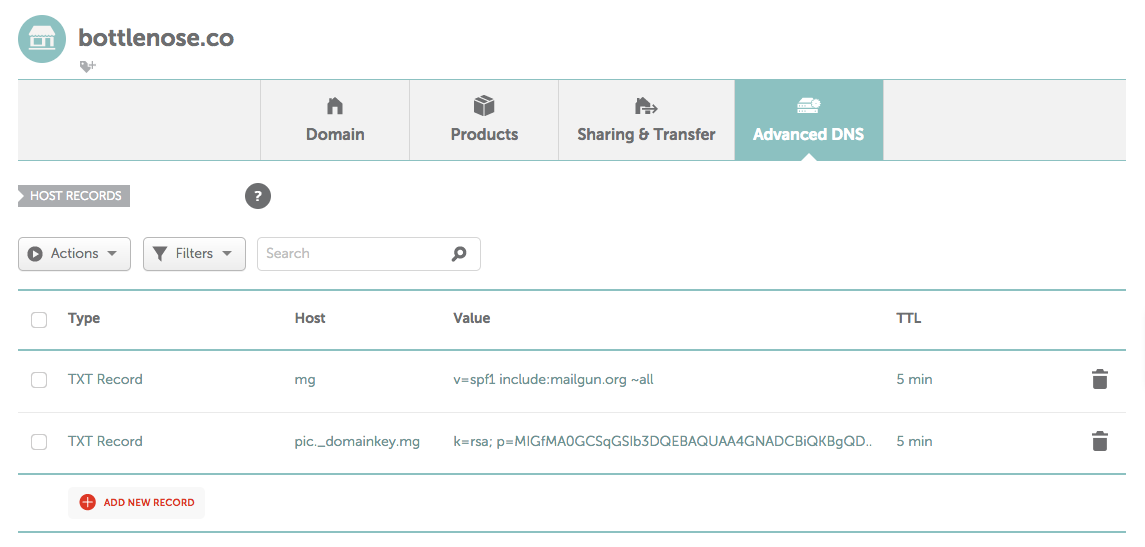
In the Mailgun website you will see the following instructions:

Add the DNS records accordingly in your DNS provider:
DNS Records For Tracking
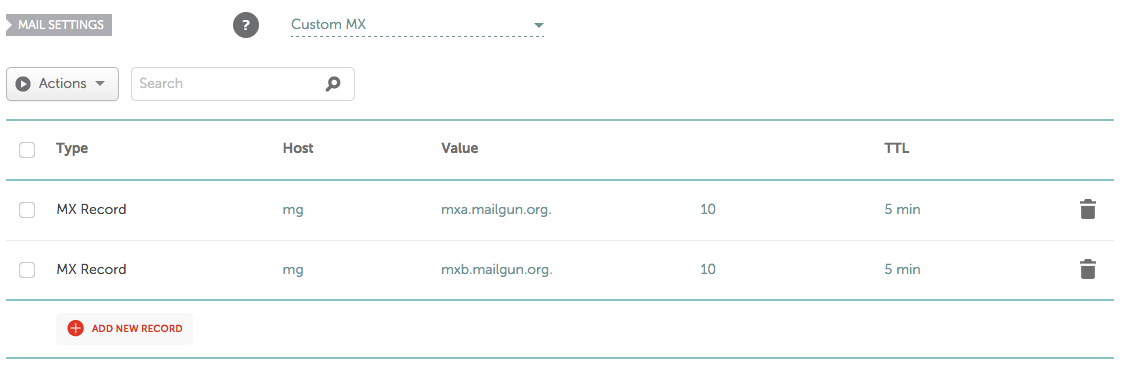
In a similar way, add now a CNAME for tracking opens, clicks etc. You will see those instructions:
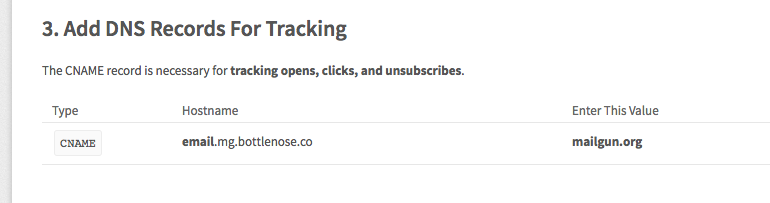
Follow them accordingly:
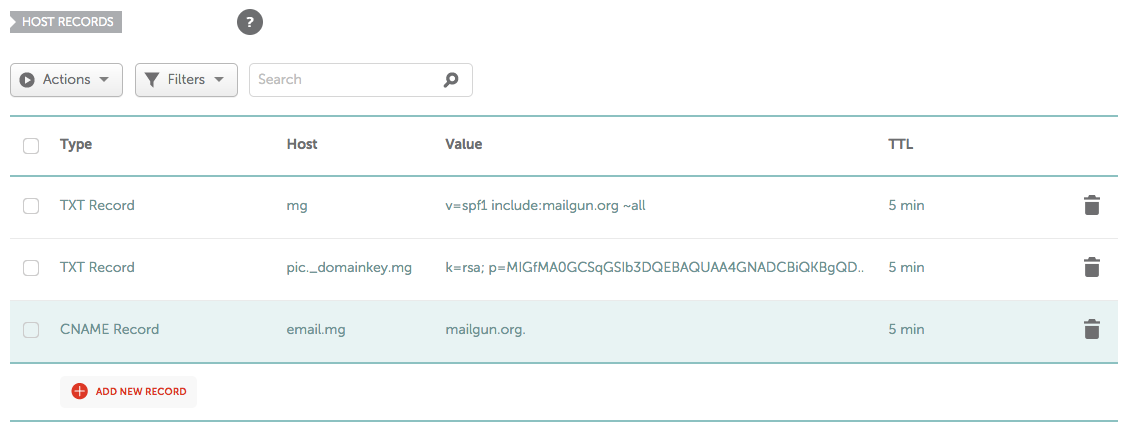
Remember, in the previous screenshot you are supposed to do in your DNS provider!
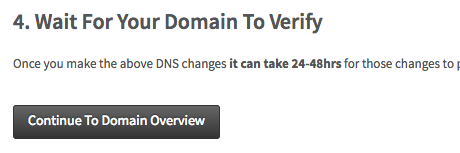
Wait For Your Domain To Verify
Now it’s a matter of patience. We gotta wait for the DNS to propagate. Sometimes it can take an eternity to propagate. But my experience with brand new domains is that it usually happens very quickly. Wait like 5 minutes and give it a shot.
Click on Continue to Domain Overview:
You will now see something like this:
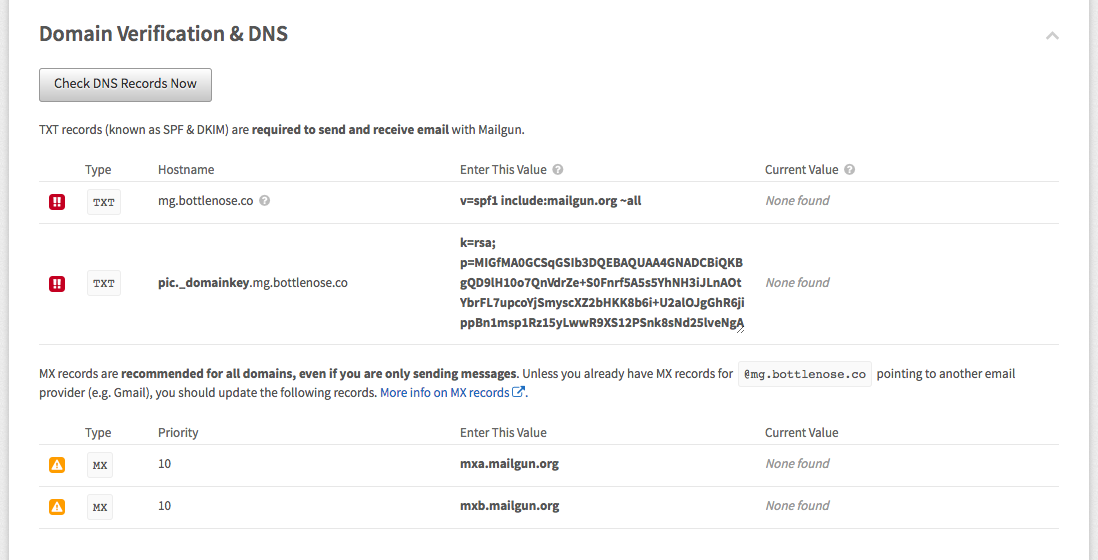
Click on Check DNS Records Now and see if Mailgun can verify your domain (remember, this process can take up to 48 hours!).
If the verification was successful, you will see the screen below:
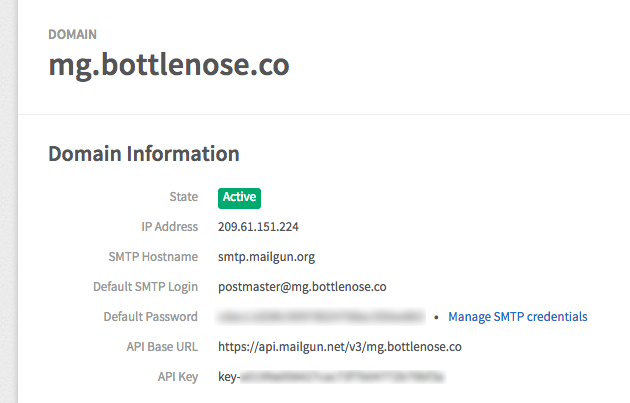
Configuring Django to Send Emails
To configure you Django Project, add the following parameters to your settings.py:
EMAIL_HOST = 'smtp.mailgun.org'
EMAIL_PORT = 587
EMAIL_HOST_USER = 'postmaster@mg.bottlenose.co'
EMAIL_HOST_PASSWORD = 'mys3cr3tp4ssw0rd'
EMAIL_USE_TLS = True
Note that we have some sensitive informations here, such as the EMAIL_HOST_PASSWORD. You should not put it directly
to your settings.py file or commit it to a public repository. Instead use environment variables or use the Python
library Python Decouple. I have also written a
tutorial on how to use Python Decouple.
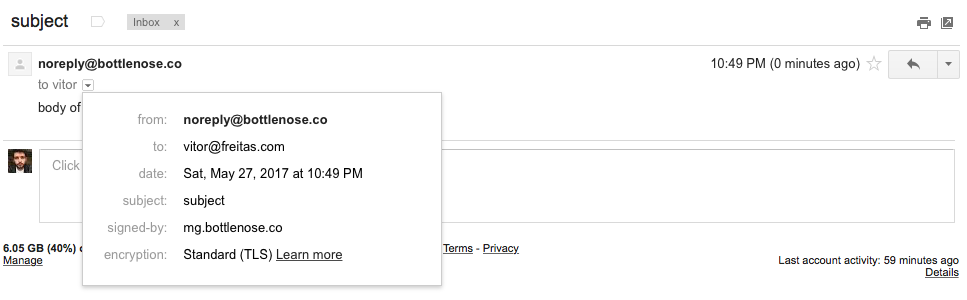
Here is a very simple snippet to send an email:
from django.core.mail import send_mail

send_mail('subject', 'body of the message', 'noreply@bottlenose.co', ['vitor@freitas.com'])
And here is how the email will look like, displaying properly your domain:
If you need to keep reading about the basic email functions, check my previous article about email: How to Send Email in a Django App.
 Ask Vitor #3: Mocking Emails
 How to Send Email in a Django App
 How to Extend Django User Model
 How to Setup a SSL Certificate on Nginx for a Django Application
 How to Deploy a Django Application to Digital Ocean