When it comes to build forms, Django Forms can be really handy. If your application provide ways for the end-user to input data, it’s strongly advised to do so through the built-in Django Forms. It will automate a good amount of work as well as providing a really stable and secure functionality.
In a nutshell, Django handles three distinct parts of the work involved in forms:
- Preparing and restructuring data to make it ready for rendering;
- Creating HTML forms for the data;
- Receiving and processing submitted forms and data from the client.
The parts 1 and 3 are usually fine for the most cases. But when it comes to the actual HTML forms rendering, sometimes it lacks some options.
That’s where the Django Widget Tweaks takes place. I’ve been using it on my past projects, and I find it really useful. In this brief article, I will introduce you to the basics of this package, and show some of its use cases.
The problem
Before we start to talk about the Django Widget Tweaks package itself, I wanted to elaborate a little bit more about the problem I usually face that motivated me to look for this solution.
Most of my projects I use Bootstrap as the base for my css. In some cases I even use it out of the box. If you are familiar with Bootstrap, you probably know it needs some css classes for the forms elements to look good.
A basic example of a form using the Bootstrap classes would be:
<form>
  <div class="form-group">
    <label for="id_email">Email address</label>
    <input type="email" class="form-control" id="id_email" name="email">
  </div>
  <div class="form-group">
    <label for="id_password">Password</label>
    <input type="password" class="form-control" id="id_password" name="password">
  </div>
  <button type="submit" class="btn btn-default">Submit</button>
</form>
The problem usually lives in the need to add some extra attributes to the HTML element, preserving the old ones, that would automatically generated by Django, based on your models. In this case, it would be the div element with form-group class, as well as the form-control class in the input element.
For example, if we consider the following model:
from django.db import models

class Person(models.Model):
    first_name = models.CharField(max_length=30)
    last_name = models.CharField(max_length=30)
    email = models.EmailField(max_length=254)
    phone = models.CharField(max_length=20)
    bio = models.TextField(max_length=500)
And for this model, we create a Django Form:
from django import forms
from simple_forms.apps.core.models import Person

class PersonForm(forms.ModelForm):
    class Meta:
        model = Person
        fields = ('first_name', 'last_name', 'email', 'phone', 'bio',)
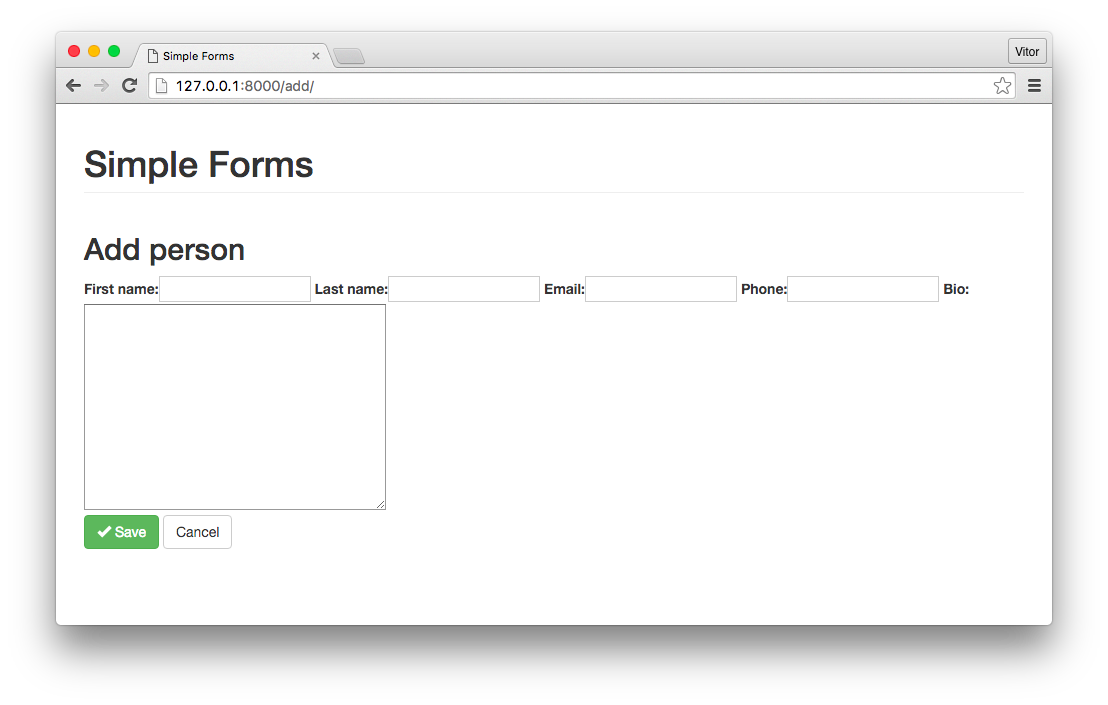
If we render this form right away, using the following code:
<form method="post">
  {% csrf_token %}
  {{ form }}
  <div class="form-group">
    <button type="submit" class="btn btn-success">
      <span class="glyphicon glyphicon-ok"></span> Save
    </button>
    <a href="{% url 'home' %}" class="btn btn-default">Cancel</a>
  </div>
</form>
It would look broken, like the picture below:

Installation
You can install it with pip, or download it from PyPI if you prefer:
$ pip install django-widget-tweaksNow add widget_tweaks to your INSTALLED_APPS:
INSTALLED_APPS = [
    'django.contrib.auth',
    'django.contrib.contenttypes',
    'django.contrib.sessions',
    'django.contrib.messages',
    'django.contrib.staticfiles',

    'widget_tweaks',

    'simple_forms.apps.core',
]
Usage
I will show just a few of the many options the package offers. You can learn more reading the official docs.
To start using it, you must load the template tag in the template you want to use its functions:
{% load widget_tweaks %}Now expand your form by iterating through its fields, in order to expose the input tags, replacing this:
{{ form }}For this:
{% for hidden in form.hidden_fields %}
  {{ hidden }}
{% endfor %}

{% for field in form.visible_fields %}
  <div class="form-group">
    <label for="{{ field.id_for_label }}">{{ field.label }}</label>
    {{ field }}
    {% for error in field.errors %}
      <span class="help-block">{{ error }}</span>
    {% endfor %}
  </div>
{% endfor %}
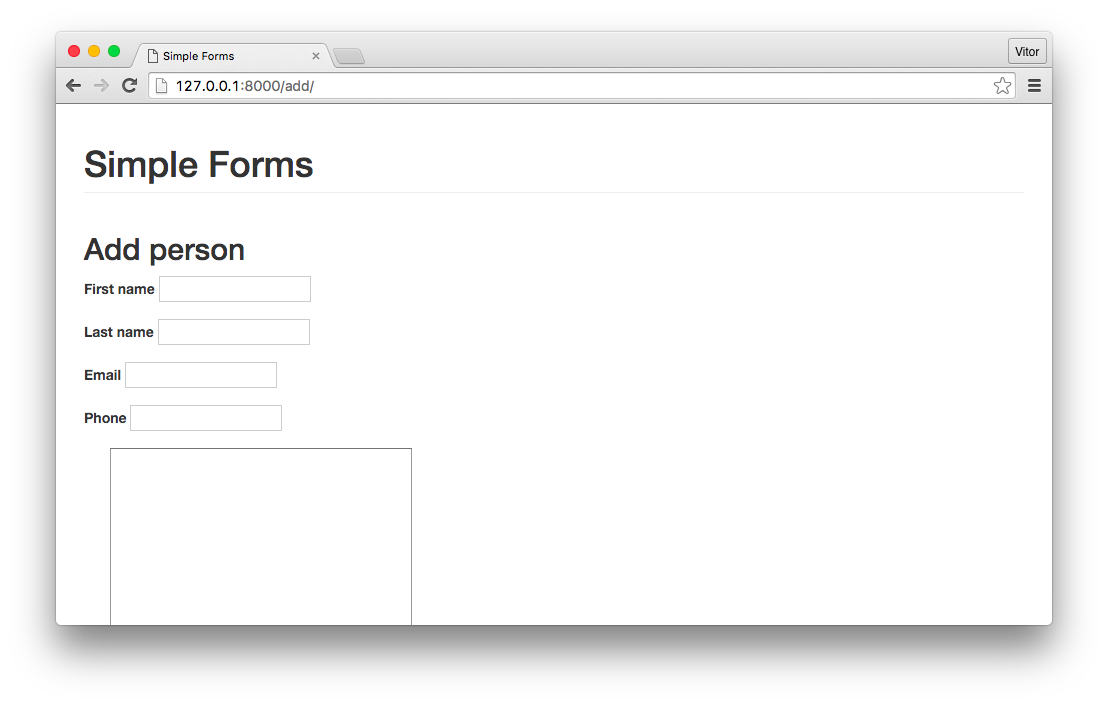
At this point we already added several Bootstrap elements, but our form still looks broken:

Now to put Django Widget Tweaks in action, add an extra attribute to the field element:
{{ field|add_class:'form-control' }}
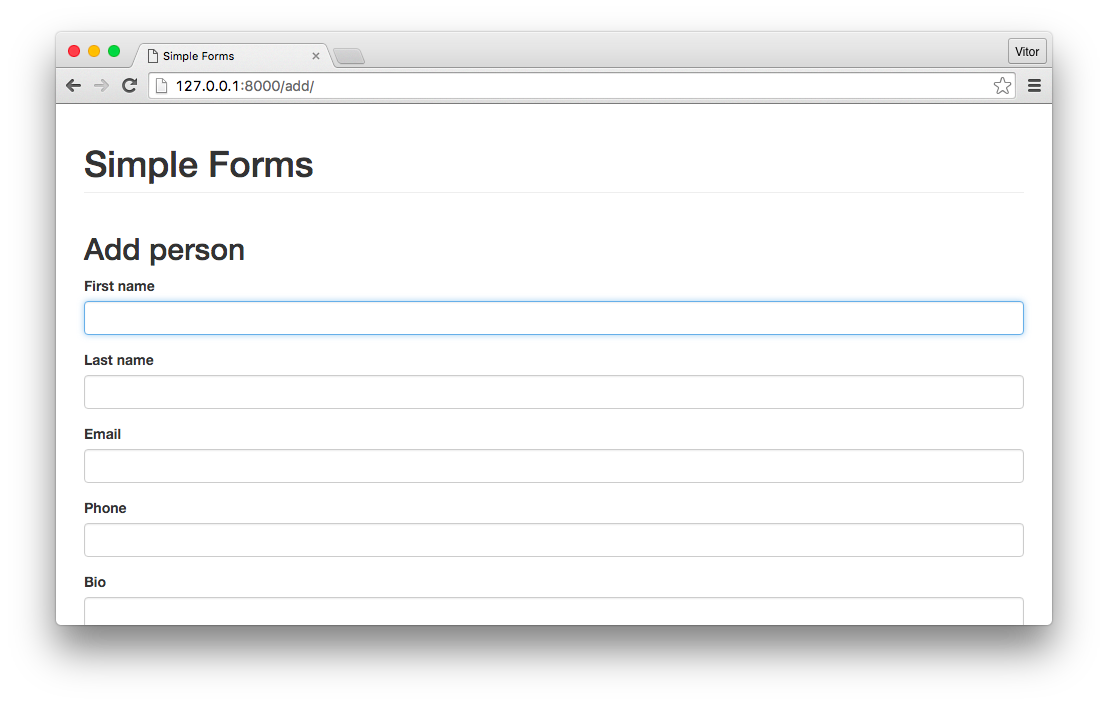
The final result of our template is shown below:
{% extends 'base.html' %}

{% load widget_tweaks %}

{% block content %}
  <h2>Add person</h2>
  <form method="post">
    {% csrf_token %}

    {% for hidden in form.hidden_fields %}
      {{ hidden }}
    {% endfor %}

    {% for field in form.visible_fields %}
      <div class="form-group">
        <label for="{{ field.id_for_label }}">{{ field.label }}</label>
        {{ field|add_class:'form-control' }}
        {% for error in field.errors %}
          <span class="help-block">{{ error }}</span>
        {% endfor %}
      </div>
    {% endfor %}

    <div class="form-group">
      <button type="submit" class="btn btn-success">
        <span class="glyphicon glyphicon-ok"></span> Save
      </button>
      <a href="{% url 'home' %}" class="btn btn-default">Cancel</a>
    </div>
  </form>
{% endblock %}
Another way to render the fields is using the render_field template tag, which gives you a flexible way to render Django fields using a HTML-like syntax:
{% render_field form.first_name class="form-control" %}You can also use the template variables as attribute values:
{% render_field form.first_name class="form-control" placeholder=form.first_name.label %}Personally I find this package really useful, because it let you customize your form elements in a non intrusive way, without having to add extra css class inside the form definition. Also it’s more clear this way, because afterall the css classes are related to the page layout.
Again, there’s a lot more you can do with it, you can learn more by reading its documentation. Also, the project I created to ilustrate this article can be found on GitHub sibtc/simple-django-widget-tweaks.


 (Picture:
  A Complete Beginner's Guide to Django - Part 7
 A Complete Beginner's Guide to Django - Part 6
 A Complete Beginner's Guide to Django - Part 5
 How to Extend Django User Model
 How to Setup a SSL Certificate on Nginx for a Django Application
 How to Deploy a Django Application to Digital Ocean